Stampin Up Shabby Rose Tutorial
Hi everyone! Today I am sharing a new flower tutorial for another style of Shabby Rose, this time made with Stampin Up punches.
I am a great fan of Stampin Up punches and use them extensively in my workshops, they are extremely good quality and very easy to use. I particularly love the flower punches and today I am using these three:

Pansy, Fun Flower and Petite Petals
This is a photo heavy blog post so brace yourselves!

As always I have used Stampin Up Very Vanilla card stock to punch four of the Fun Flower, four of the Pansy and two of the Petite Petals.

Punch a hole in the middle of each flower and gather them together with a brad, but stagger the petals.
 |
Fill your Stampin Up spritzer with water and give the petals a good spray. |

Then start to fold up the petals around the brad. The two smaller ones are the hardest, it gets easier !!

Keep on scrunching up each layer giving a spritz of water in between each so that all the petals are quite sodden with water.
I always use Stampin Up card stock for my flowers as it is the only card stock I know that will take this amount of water.

When you get to the final four layers give the petals a bit of a squeeze at the tips before scrunching them.

And this is what you end up with.

Then while it is still very wet start to curl the petals around a thin knitting needle. You need to be gentle as it is very easy to break off a petal.

Keep moving around the layers pulling out all the Fun Flower petals.

When you get to the Pansy petals just poke them out with the needle to fill out the space.

Leave the two tiny Petite Petals covering the brad.

Then leave it to dry.
The flowers are best left to dry overnight but you can give them a blitz with a heat gun. You will notice how the paper pulps up as it dries and this is more noticeable when left to dry naturally.
And here are some I have made with other Stampin Up papers:

This flower has been made with petals cut from the Naturals White A4 cardstock. It dries like a porcelain and is very beautiful.

The fabulous Stampin Up Blackberry Bliss Cardstock - this colour is just gorgeous! The cardstock is harder to work with and watch the stain from the darker colours when you spritz with water (I had lovely pink fingers after making this one!).

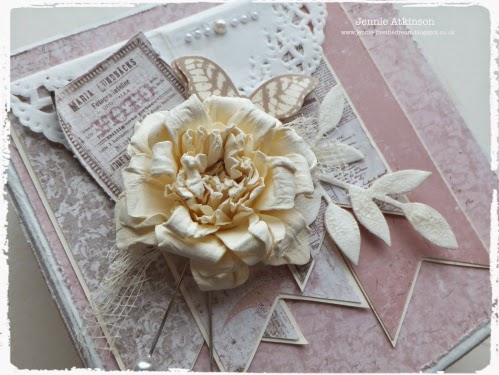
Stampin Up paper can also be used but don't use as much water. I sprayed this with a little Vanilla Shimmer Smooch Spritz while it was drying. Choosing a pattern with a white or lighter underside makes a nice contrast.

For this flower I used Whisper White Cardstock but instead of using water I mixed some So Saffron Re-inker with the water in my spritzer. This gives a lovely delicate colouring. It also got a bit of Vanilla Shimmer Smooch whilst drying.

I hope this tutorial has given you a few ideas of how you can make these flowers - I can't wait to try some Christmas papers with the Shimmer Smooch!
And don't limit yourself to punches, the Stampin Up Florals Frame Die, Flower Fair Die and Bigz Flower Frenzy Die would all make gorgeous flowers.
Thank you for joining me today.
Jennie x
Stampin Up supplies used:
Fun Flower Punch
Pansy Punch
Petite Petals Punch
Very Vanilla Cardstock
Whispher White Cardstock
Blackberry Bliss Cardstock
Naturals White A4 Cardstock
Designer Series Paper
Stampin Spritzer
So Saffron Re-inker
Vanilla Shimmer Smooch Spritz
Comments
It seems as though I must invest in some of the card stock as it dries so beautifully.
Thanks a lot,
XxRuth
Hugs,
Nancy
Hugs,
Linda
Rini from the Netherlands .