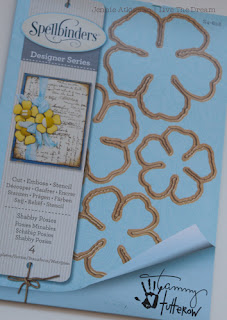
Shabby Posies Tutorial
Hello and thank you for joining me today and a huge welcome if you have hopped on over from Country View Projects.
There are four dies in the set and for this card I used the second largest die.
I cut three flowers from cream cardstock and then inked the edges with Distress Inks: first Fossilised Amber, then Rusty Hinge and finally Seedless Preserves.
These then got spritzed with water ......
and then scrunched up ....
(I find it most useful to use the end of a small paintbrush to get the scrunching started)
Scrunch them as tightly as possible ........
Then leave them to dry naturally - overnight if possible so that every part is dry before you move on to the next stage.
When they are completely dry open out carefully and use a bone folder to smooth out the petals but keep in all those lovely creases!
If you are using a stamen stem then it is a good idea to punch the holes now!
Roll the edges - I find an old thin knitting needle good for this!
Roll the edges on all three petals but roll them successively tighter so that when you layer them they are not sitting directly on top of each other.
Thread the stamen stem through the holes .....
.... and add some pva glue to the back of the stem to keep everything in place.
The finished flower .... which makes for a beautiful adornment on a simple layered card.
I hope this photo tutorial gives you some ideas for making flowers with this fabulous set from Tammy and pop back later in the month when I will have another tutorial using more of these dies.
Thanks for joining me today!
Jennie x


Comments
Corrie x