Celebrating Three Generations and Some Very Special News!
Hello and welcome to the first day of a new month and some special news.
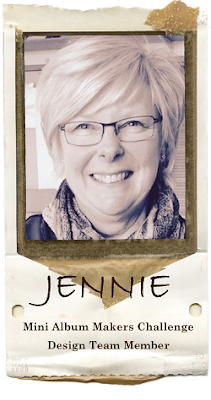
I am delighted to share that I have been invited to join the design team of Mini Album Makers Challenge and today I will be sharing my first mini book and tutorial with you all here as part of the Team.
As many of you will know making mini books is a great passion of mine and it was where I started nearly ten years ago with my paper crafting. So it really is a great honour to be part of the fabulous team over at Mini Album Makers.
I hope over the coming months you will enjoy the tutorials I will be sharing with you and that it will inspire you to get those scrapbook papers, paints, inks and stamps out to create these wonderful little marvels. In addition I hope it will act as a resource for you to come back to from time to time.
The mini book I am sharing with you today is made from a single sheet of 12 x 12 cardstock and despite it's size at 6" x 3" has plenty of room for photographs and pockets and tags for the stories I want to record in it. My fellow Design Team members have made a stunning array of mini books and you can't fail to be inspired. Do hop on over to see what they have created by clicking the link HERE.
First of all I will share the photographs and details of the mini book and then I will share a tutorial for making it. It will be a long post! Sorry !!!
The cover ...
Inside front: This is my grandmother aged 18 and I have plenty of room to share her amazing story (widowed with three young children under 5) on the pocket tags and the large tag behind the photograph.
Despite being only 3" wide I still love creating little collages wherever possible.
The next two pages focus on my great grandmother and I have created a side pocket to hold tags as well as the larger tag behind the photograph. I have used an Envelope Board to create the fancy cutting, details are below in the tutorial.
And finally on the back of the book is a photograph of my great great grandmother. I don't know much about her other than she used to love writing, so I have created a little collage to celebrate this.
Tutorial for the Mini Book
Score a 12 x 12 piece of scrapbook paper at 3", 6" and 9" to create four panels.
Fold the paper in half with your preferred pattern on the outside.
Open out and adhere double sided tape to the outside panels on the top of the sheet.
And fold the bottom up to meet to the top to create a concertina folded four panels: the outside panels are stuck down and will create the front and back covers and the two inside panels are open and can take the large tags.
I like to punch a couple of half circles in the inner pockets to make it easier to get the tags in and out.
You can either make a pocket for the right hand side by cutting a strip of cardstock 6" x 1 3/4" and then an inner mat measuring 5 7/8" x 15/8", or .... if you have an Envelope Board with the V cut notch you can make this a little fancier!
The strip of cardstock measures 6" x 1 3/4" and I have cut the notch on the left hand side at 1 1/2".
Flip the cardstock over and cut another notch on the other side at 1 1/2".
Cut the strip out of the middle and you have a lovely shaped pocket.
It is easy to cut an inner matt to fit by using a strip of patterned cardstock measuring 5 7/8" x 1 5/8" and cutting the notch at 1 3/8". I hope that makes sense! Basically the inner matt is 1/8" smaller all around.
I have used the same notch to cut this little pocket too.
Cut a piece of base cardstock 2 3/4" x 2".
This time place the edge of the cardstock at the score guide and punch.
Flip the cardstock over and do the same again for the other side.
To make an inner mat to fit this your patterned paper needs to be 2 5/8" x 1 7/8" and punch as before.
I have added a little "belly band" from the scraps to create another layer for tags.
Finally you need to cut the covers for the front and back to give the book some substance. The cream cardstock base measures 2 3/4" x 5 3/4" and the inside layer 2 5/8" x 5 5/8". These can be stuck down onto the back but when sticking them onto the front make sure you capture your ribbon underneath.
If you are still with me well done and thank you!
And so I have four weeks to think and design another mini book to share with you - I can't wait!
As always thank you for joining me today and I hope you find time to join in our challenge and share your mini book with us at the Mini Album Makers Challenge.
Have a great weekend!
Jennie x


Comments
Alison x
TFS and best wishes
Annie x
Cheers
Dr Sonia
As for your debut mini album well its without a doubt an absolute beauty and a wonderful place to keep those treasured family photos.
It really is hard to believe that from one sheet of 12x12 such a beautiful project can be made .
Thanks for sharing a great tutorial too .
Hugs x