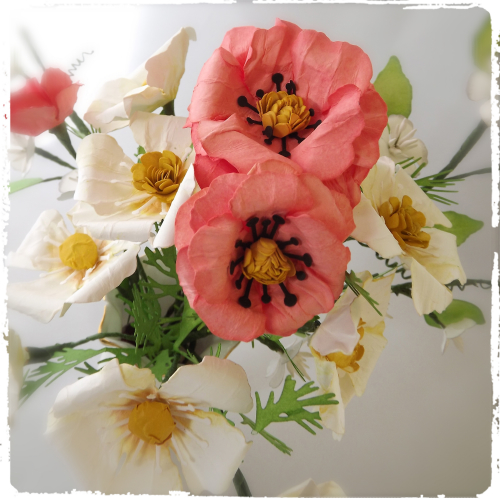
Summer in a Vase
Summer for me are the bright colours of the flowers in my garden. Being so far north not a lot grows, but I love the reds of the poppies and the white of the cosmos and Snow in Summer which all nestle among the green leaves of the (yet to flower) montbretia, crocosmia and lilies. So as summer just hasn't got here yet I thought I would make a vase of my favourite flowers to brighten up the kitchen dresser.
I had great fun creating the individual flowers and I will show you here how I created the white cosmos type flowers and the poppies. I will link in another tutorial for the Snow in Summer lookalike otherwise you will be photo'd out!
I cut my flower shapes from white cardstock. I used Stampin Up Whisper White card and the Spellbinders Rose Creations Die. Using a cotton bud I blended a little Fossilized Amber around the centre area, spritzed with water and scrunched them up. I let them dry overnight and then carefully opened them up.
For the centre of the flower I put some wire through a small button and then covered the button with some dark yellow vellum type paper.
I shaped the flower by pulling out the individual petals with a bone folder and then curling them around a knitting needle. Then I built up my flower adding a stamen cut from white cardstock.
I added a little bit of clear drying glue to the back.
While the glue was drying I cut some Holiday Greens in white cardstock and inked them with Mowed Lawn Distress Ink. (These really are all year round leaves!)
Then using florists tape start winding around the wire. Get a good grip at the top and as high as you can to the flower to get a neat finish.
As you progress down the wire you can add in the leaf.
And keep going until you reach the end of the wire, or add another piece of wire in if it is too short.
I really did feel as though I had blossoms growing on my craft desk!
The poppies was created in exactly the same way but I layered three petals on top of each other and used Abandoned Coral to colour them (such a gorgeous colour!) and a black stamen
I used the smalls die from Donna Salazar's Bitty Blossoms set, inking with Fossilized Amber before rolling it up and then squishing the leaves together.
I do hope you like these flowers and will have a go yourself. I must admit they are brightening up a very grey day here!
I would like to enter my vase of summer flowers into the current challenge at Frilly and Funkie which is It's Summer.
 Click the link HERE for the Snow in Summer branches tutorial.
For the centre of the flower I put some wire through a small button and then covered the button with some dark yellow vellum type paper.
I shaped the flower by pulling out the individual petals with a bone folder and then curling them around a knitting needle. Then I built up my flower adding a stamen cut from white cardstock.
I added a little bit of clear drying glue to the back.
While the glue was drying I cut some Holiday Greens in white cardstock and inked them with Mowed Lawn Distress Ink. (These really are all year round leaves!)
Then using florists tape start winding around the wire. Get a good grip at the top and as high as you can to the flower to get a neat finish.
As you progress down the wire you can add in the leaf.
And keep going until you reach the end of the wire, or add another piece of wire in if it is too short.
I really did feel as though I had blossoms growing on my craft desk!
The poppies was created in exactly the same way but I layered three petals on top of each other and used Abandoned Coral to colour them (such a gorgeous colour!) and a black stamen
I do hope you like these flowers and will have a go yourself. I must admit they are brightening up a very grey day here!
I would like to enter my vase of summer flowers into the current challenge at Frilly and Funkie which is It's Summer.
Thank you for joining me today.
Jennie x
 Click the link HERE for the Snow in Summer branches tutorial.


Comments
xoxo Sioux
Thank you for the inspiration
XxRuth
Anyway, thanks so much, I will definitely give these a try at some point!!
Cheers
Dr Sonia
Cards Crafts Kids Projects