Tea Cup Coasters and Napkin Box for Eileen Hull Designs

Hello and Welcome to a fun little project using Eileen Hull's latest two die releases - Tea Cup and Spoon and Post Box.

Before I share a tutorial here are a few details:


I have made the box by turning it onto its side. I have kept the decoration simple using some lovely stamps from PaperArtsy (Scrapcosy ESC15) and papers from Graphic 45.


The two tea cup coasters sit inside perfectly along with a couple of nice napkins.


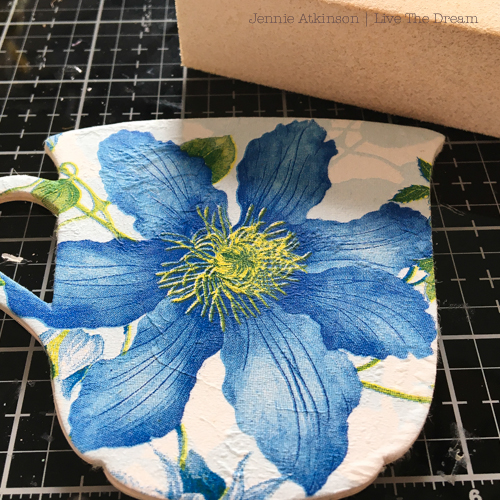
I used the same napkins to decorate the coasters and spoon ......


...... which were crackled and aged using DecoArt Crackle Paste and  White Antiquing Cream. I have used gold metallic paint around the edges which you often see on china teacups and saucers, again trying to get a distressed look.

Unfortunately I am only working with die cuts as the die has not arrived  here in the UK yet. Once it does arrive I will die cut the cup in cork and adhere it to the back of the coasters so it doesn't slip.


This will make a lovely present for a tea drinking friend and there is just enough room to squeeze a couple of nice tea bags in behind the napkins.

Please do scroll down for the tutorial and there is a little extra at the end as I made another two coasters from a different crackle medium!  As always thank you for joining me and I hope you have fun with these new dies from Eileen. I can see there are many possibilities!

Jennie x

_________________________

TUTORIAL


I have used the Post Box on its side, cutting off the two side flaps to create the open top of the box. Had I got the die I would have covered my board with papers for both the outside and inside of the box. But I made the box up and then cut papers to fit.


I had thought about having the side (which is the top!) of the box opening, but decided it looked better stuck down and the cups still sit inside ok.


Again had I had the die I would have adhered my napkin to the board and then cut out the cup shape, rather than adding the napkin and then having to cut around the edges. It still worked though!


I used a sanding block to smooth out some of the edges.


Once the Gel Medium had dried overnight I then added the Crackle Glaze and again left it to dry overnight to ensure the crackle did its stuff!


Adding the Antiquing Cream highlights the cracks. Each coaster then got three coats of varnish to seal the distressed napkin and to ensure that a hot cup does not cause any damage.


I also made another pair of coasters this time using a different type of Crackle Medium.


The die cut shapes were first painted with an Acrylic Chalk Paint (PaperArtsy Fresco Finish Space Cadet) and were then covered with DecoArt Weathered Wood.


When the Weathered Wood has dried the "magic" happens when you add another Acrylic Paint over the top which reacts with the Weathered Wood and cracks to show the colour underneath.


I have used the PaperArtsy stamps I used on the box, this time stamping on tissue paper with Archival Ink.


It is then possible to adhere the torn tissue paper stamped area to the cup shape with Gel Medium. Again I added three coats of varnish to protect the artwork and will add cork to the reverse once I get the die.

Dies used:

Sissix Eileen Hull Bigz L Die Tea Cup & Spoon #664797
Sissix Eileen Hull Scoreboards XL Post Box #664798

Comments

Lisa Hoel said…
Gorgeous project Jennie! =)
eileen hull said…
So smart to use the Post Box as a container for the teacup coasters- I knew the shape looked familiar 😀! I hope the dies arrive soon Jennie!
So many great ideas and amazing attention to detail - love it!
Pami said…
Amazing! Need to try it! 🎯
Julia Aston said…
what a creative use of the box on it's side Jennie - the decoupaged napkins are just beautiful on the cups and spoon! And the teacup coaster idea is wonderful!